
Creating an AI Assistant
When I first began using AI tools in my editorial workflow, I focused on writing prompts and learned how I should structure them. That work was incredibly useful because it helped me understand how AI tools respond to instructions.
Once you write those prompts, however, you have to keep track of them and copy them again and again. This led me to AI assistants. Because an AI assistant is designed for a specific task, I didn’t need to copy my prompts repeatedly or remember where I saved them, which, honestly, was my biggest problem! I learned how to create AI assistants in one of Erin Servais’s AI for Editors courses. Her courses have been invaluable to me for learning how editors can use AI practically and responsibly.
Recently, I had the perfect opportunity to try out a simple custom GPT. I was working on the third edition of a book, and the author provided a list of 50 sources to be added to the bibliography. The only information I received was the titles and authors’ names. I needed to locate the missing publication information and format everything to match the existing bibliography from the second edition, which followed The Chicago Manual of Style (CMOS). Instead of searching for each book title and author, I created an AI assistant to help me gather the missing information and format the entries according to CMOS.
Here’s how I did it, step by step, using ChatGPT. In ChatGPT, these assistants are called GPTs or custom GPTs; in Gemini, they are Gems; and in Claude, Projects and Skills. You can follow the same process for creating an AI assistant in Gemini and Claude as I illustrate here for ChatGPT; however, the naming conventions may differ slightly.
Getting Started
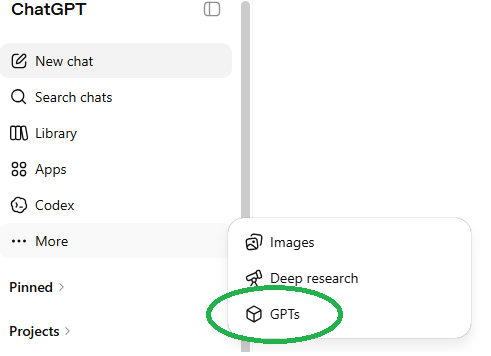
I opened ChatGPT and, in the left margin, selected More from the drop-down menu to find GPTs. I clicked on GPTs (circled in green in the screenshot below):
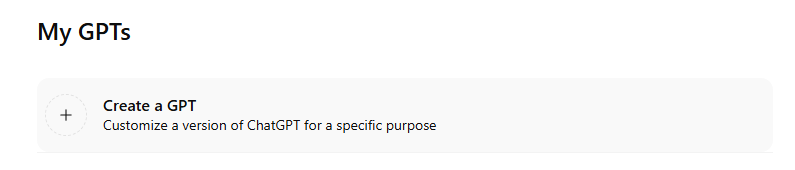
This brought me to the next screen, where I clicked on My GPTs in the top right corner. I then selected Create a GPT:
Configuring Your GPT
Once I selected Create a GPT, ChatGPT took me to the configuration screen:
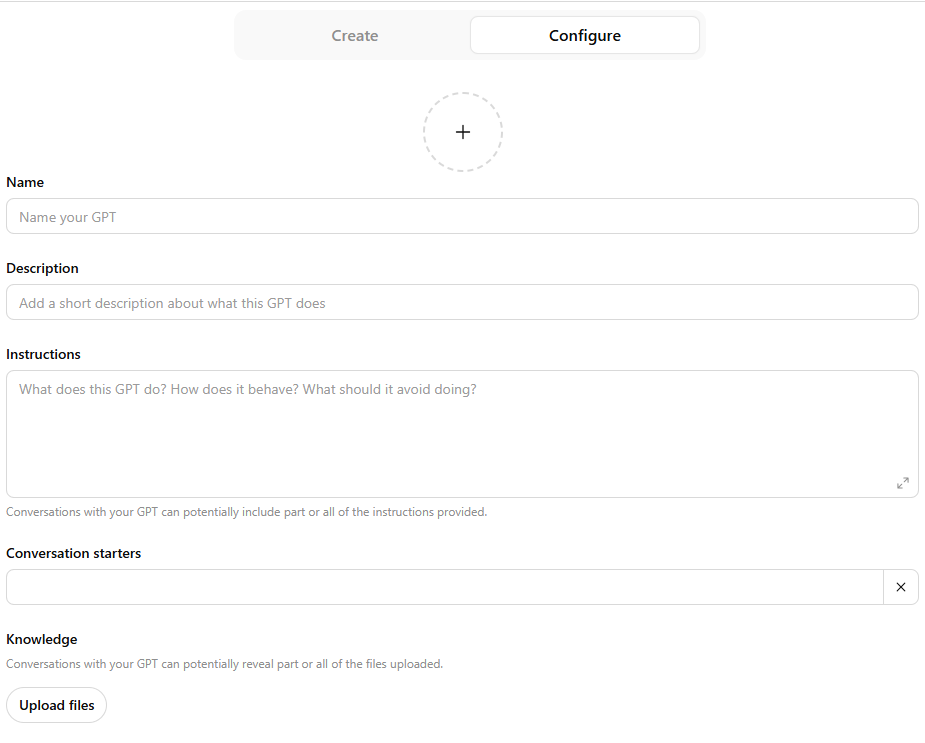
As you can see in the screenshot, the GPT builder asks you to complete several fields: Name, Description, Instructions, and Knowledge. You can also add an image by clicking the circle above Name, but that step is optional. I usually skip the Conversation Starters section; the most important fields are Instructions and Knowledge. The instructions tell the GPT how to behave, and the knowledge files give it examples or reference material to work from.
After completing this setup screen, select Configure, and your custom GPT is ready to go. If you want ChatGPT to help you build the GPT by drafting the setup for you, you can select Create, but I recommend doing it yourself by configuring it.
Let’s take a closer look at the Instructions and Knowledge for my particular GPT to see what I included there.
Adding Instructions and a Knowledge Document
Here is what my completed setup screen looks like for my custom GPT:

I want to focus particularly on the Instructions and Knowledge (see the screenshot above) because they are the backbone of the GPT. For this particular GPT, I wanted it to find complete publication information for sources based on limited details and then format each bibliographic entry according to CMOS.
I’m not going to provide the complete instructions here because they are too long, but the most important point is that they tell the GPT how to think, not just what to produce. For a custom GPT like this one, the instructions should clearly outline the main components of the task, which may include:
Task: What do you want the GPT to do?
Workflow: What steps should it follow?
Source hierarchy: Which sources should it trust first?
Accuracy rules: What should it do when information is missing, unclear, or conflicting?
Formatting rules: What style or format should it follow?
Final output: What should the GPT give you at the end?
The next important step is to provide the AI assistant Knowledge it can draw from. In this case, my knowledge document includes specific examples of reference entries formatted according to CMOS, so my custom GPT knows exactly how I want the entries to look. Like my instructions, my knowledge document is quite long and includes detailed examples that are labeled and structured.
Here’s an example from my knowledge document:
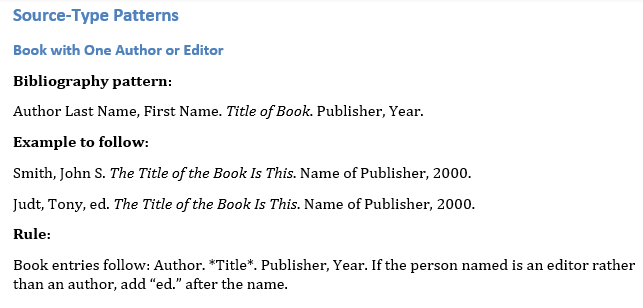
You might ask, “Can’t you just tell ChatGPT to follow the bibliography style for CMOS?” Yes, you can, but you are not going to get the results that you want. That’s because AI tools perform better when they have specific examples to follow. A general instruction, such as “follow CMOS,” gives ChatGPT a direction, while a knowledge document gives it a model.
This is really important for editors. We often work with very specific style decisions, client preferences, formatting rules, and exceptions. A knowledge document gives the custom GPT those details upfront, so you don’t have to repeat them in every prompt. It also helps the GPT produce more consistent results because it is drawing from your examples, not just making its best guess. In other words, the knowledge document is where you teach the GPT how you want the work done.
Because you upload the knowledge document as a Word file (or Excel or other type of file), it is very easy to change it as your needs change. For example, perhaps the author is now providing you lots of podcasts to add to the reference list. You can then add those examples to the knowledge document in Word and just replace the current one with the updated one.
Testing My AI Assistant
Once I set up the GPT, all I had to do was copy the titles and author names into the custom GPT and press Enter. Here are the results:
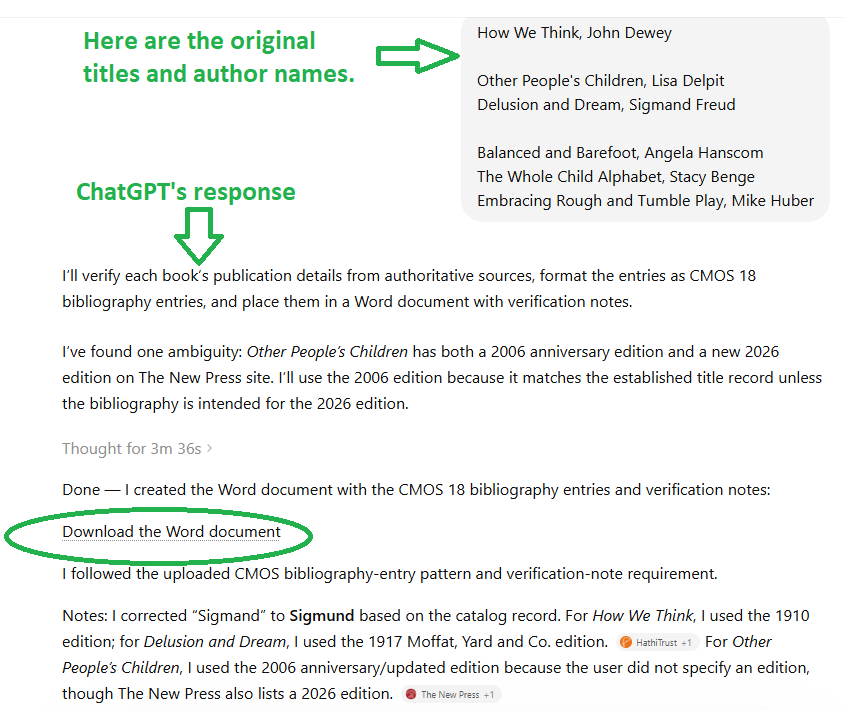
ChatGPT gave me helpful notes about what it found and downloaded the formatted references in a Word document, just as I had asked it to do in the instructions. I had purposely misspelled Sigmand Freud (instead of Sigmund Freud), and ChatGPT caught that spelling error.
In the next screenshot, you'll see ChatGPT’s final results in the Word document:
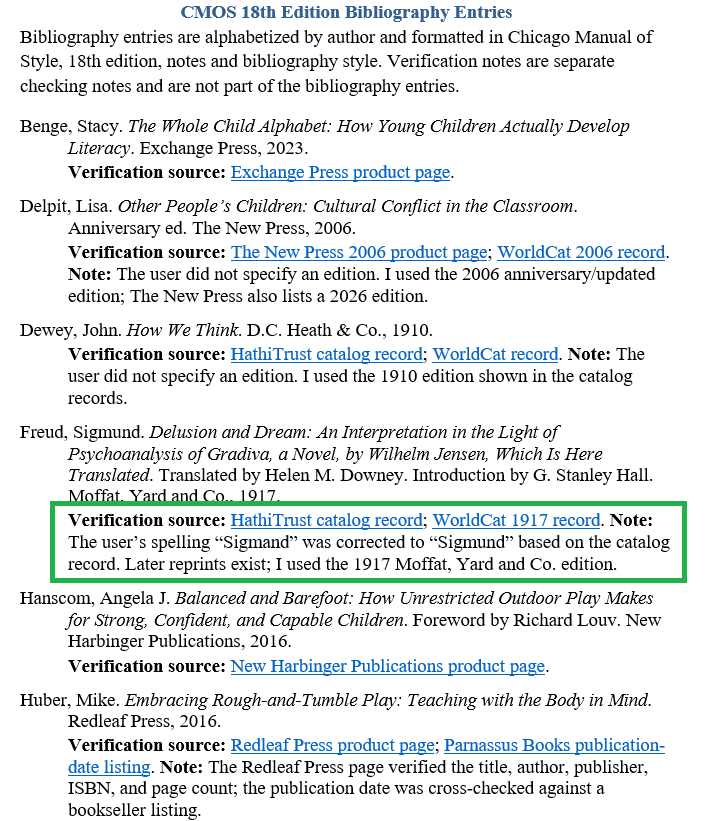
This is where my judgment as an editor still matters most. AI tools can return realistic but wrong details—a wrong publisher, year, or city—so I verify every entry against the source rather than trusting the output. I had set up the instructions to show me where the custom GPT found each piece of information (see the Verification source in the green box above), which made double-checking very fast. In this case, it did exactly what I wanted: the entries were complete (and correct) and properly formatted according to CMOS.
Why Create an AI Assistant Rather Than a Prompt?
What’s the point in creating a custom GPT, you might ask, if you can simply write a prompt and add a knowledge document?
First, as I mentioned earlier, I don’t have to copy and paste the same long prompt each time I want to use it; once I set up the assistant with instructions and a knowledge document, that setup is already there.
A custom GPT also helps me be more consistent. If I ask the AI assistant to perform a specific task—such as checking a bibliography or applying a house style—I don’t have to remember every instruction each time, because the assistant begins with the same set of directions.
Finally, I can refine the assistant as I use it. If I notice that it keeps misunderstanding a direction, I can revise the instructions. If my process changes, I can update the assistant accordingly. In that way, it becomes more like a reusable workflow than a one-time prompt.
In this blog post, I shared how to create an AI assistant to find source information and format sources according to a particular style, but you can also use it to check text against a style guide, apply a client’s house style by uploading their style sheet as a knowledge document, or flag inconsistent terminology by comparing a manuscript to a project glossary you keep as a knowledge document.
How I Used AI to Help Me with This Blog Post
Conciseness: Some of my original sentences were a bit clunky. I used Draftsmith for suggestions on how to make those sentences more concise.
Alternative text: I had ChatGPT write the alt-text for the images.
Final polish: I ran this post through MarkMyWords for a last-pass edit to catch any typos—and it did!
If you enjoyed this post, please consider signing up for my blog (see the Editing with AI subscriber bar at the bottom of the page). You’ll be notified when the next post is up and of tips and classes I think are useful. I promise never to misuse your information.